Install Minikube on Windows 10 — WSL2 -Ubuntu 18
💥How to install minikube on windows10 with WSL2 & ubuntu18💥
What is Minikube?
Minikube is a lightweight implementation of Kubernetes. It allows you to create a single node Kubernetes cluster running on a Virtual machine on your local computer. It is very easy to install on any operating system and a great tool to get started with Kubernetes basics, without having to go through the hassle of installing a Kubernetes cluster from scratch.
What is WSL2?
Windows Subsystem for Linux provides a compatibility layer that lets you run Linux binary executables natively on Windows.
WSL2 (Windows Subsystem for Linux version 2) is the latest version of WSL. WSL2 architecture replaces WSL’s architecture by using a lightweight virtual machine. In the new version, you can run an actual Linux kernel which improves overall performance.
After following a few guides, I wasn’t able to get Minikube running under WSL2 on ubuntu18 version. I tried several ways and found this method quick and easy to setup minikube on wsl2. This is specifically for the ubuntu version 18, however for the latest WSL2 versions of ubuntu it is much easier. So this guide serves as a quick TL:DR that worked for me and was repeatable particularly for the older version of ubuntu.
Prerequisites:
1️⃣ Windows 10 with WSL 2 enabled
2️⃣ systemd
3️⃣ git
Let us now install WSL2 systemd and the prerequisites
Make sure you have git installed.
sudo apt install gitThen clone the git repo in which the automation script for systemd setup for WSL containers is.
git clone https://github.com/SreekanthThummala/ubuntu_wsl2_systemd_scripts.git

cd ubuntu_wsl2_systemd_scripts/

bash ubuntu-wsl2-systemd-script.sh
# Enter your password and wait until the script has finished
Close the terminal and reopen a new one and verify its working.
systemctlIf the command displays the list of units, that means the script worked.
Install Minikube
Minikube requires conntrack packages to work properly, so install that prior to moving on.
sudo apt install -y conntrackFinally install minikube itself, and move it to the biniary folder so its globally available when you restart the bash.
Download the latest version of Minikube
curl -Lo minikube https://storage.googleapis.com/minikube/releases/latest/minikube-linux-amd64Make the binary executable
chmod +x ./minikubeMove the binary to your executable path
sudo mv ./minikube /usr/local/bin/
minikube config set driver docker
Attach or Reattach Docker Desktop WSL Integration
Finally start minikube and run the dashboard
minikube start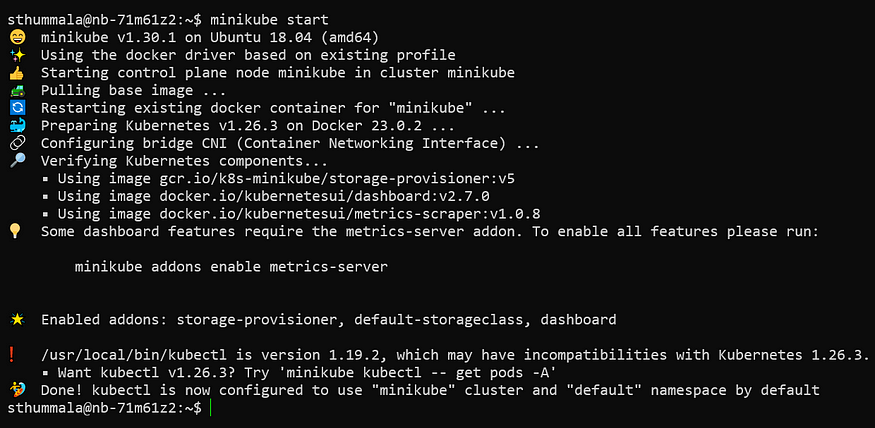
minikube status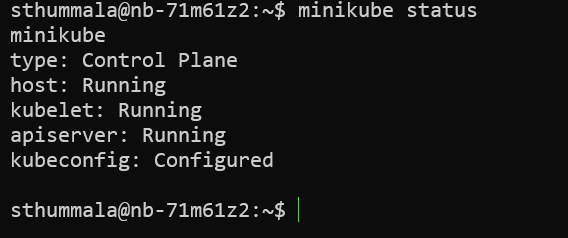
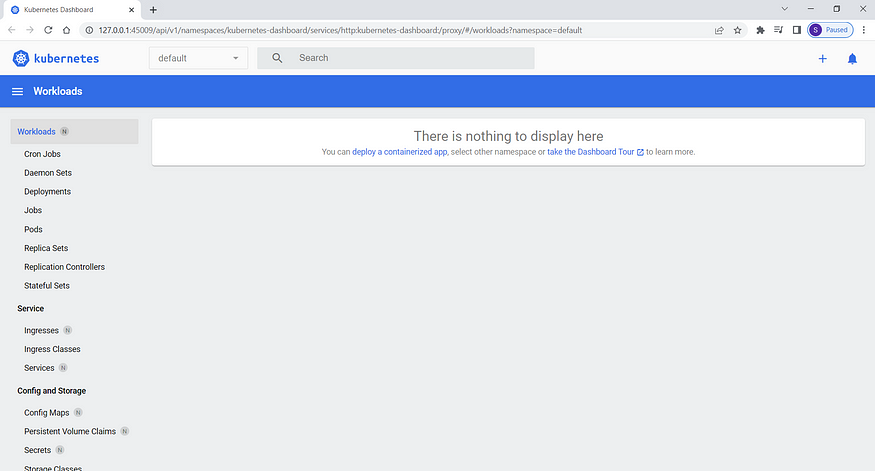
minikube dashboard
And now when you visit the link provided you should see a functional Kubernetes dashboard: http://127.0.0.1:45009/api/v1/namespaces/kubernetes-dashboard/services/http:kubernetes-dashboard:/proxy/#/overview?namespace=default
Try it out and let me know if you face problems, I am happy to help.
If you find this helpful, do Like(clap), Share and Follow me.


No comments:
Post a Comment
Note: Only a member of this blog may post a comment.